2. Linux Installation Instructions
The exercises for this course are to be done on the Linux Operating System (OS). For those unfamiliar, Linux is an open source OS that comes in many different forms called distributions—see chapter 1. Linux is used extensively worldwide and you will need to use it many times in your future career.
Therefore, for this course, you’ll need to install a Linux flavor on your machine. Below are a number of options in how to do so. We would of course not ask you to remove Windows to install Linux on your personal machine: both OSes can perfectly live side-by-side. If you are using MacOS, you should still install a Linux flavor. Even though MacOS also runs on a flavor of UNIX, they are not fully compatible. For instance, you will not be able to compile and run the device driver exercises.
There are many types of Linux distros available. We will use either Ubuntu or Bodhi—which is a more lightweight, smaller version of Ubuntu that’s easier to virtualize (see option 2 below). Ubuntu is the most newbie-friendly Linux OS.
- Download Ubuntu (choose the Ubuntu 22.04.1 LTS, filename ubuntu-22.04.1-desktop-amd64.iso) (3.6 GB image, requires
12 GB+ disk space)
- OR download Bodhi (choose the Standard release, filename bodhi-6.0.0-64.iso) (800MB image, requires
6 GB+ disk space)
For newcomers, we strongly recommend you to use Ubuntu if possible. Ubuntu’s default user password is… ubuntu.
Step A: Install Linux
Option 0: Single Boot
If you’re a hardcore software/hardware engineer, you’ll likely already have installed Linux as your only OS, and nothing else. We’re glad you’re that enthusiastic! In that case, you don’t need to do anything, except prepare the compiler: see step B.
If you only have Windows on your machine, choose option 1 or 2 instead.
Option 1: Dual Boot
The simplest option that will allow you to permanently enjoy Linux on your machine for many years to come, next to your existing OS. A “dual boot” denotes the presence of two bootable OSes; e.g. Windows 11 and Ubunutu, or macOS and FreeBSD.
Please see the official Ubuntu Install Guide if you’d like to install Linux permanently.
A dual boot installation is not without its dangers! Make sure not to erase your existing (Windows) partition! We are not responsible and will not be able to help if something went wrong. Read the install guide carefully.
If you’d rather be on the safe site, choose option 2.
Option 2: Virtualize
For this course, we provide a second option, called a “virtual machine”. This will install Linux inside of your Windows OS through an additional program called Oracle VirtualBox, which will make Linux think it’s running on normal hardware.
If you are using a 2020+ M1 Apple Mac architecture (ARM64 - click on “apple” - “about”: does “Chip” say “Apple M1”?), then you should try out the QEMU-based Mac-specific virtualization alternative called UTM. Follow the UTM docs on how to install Ubuntu (min 12 GB). Don’t forget to choose “virtualize” and mount the ARM64 .iso—the second link, not the AMD/64-bit PC one. Bodhi Linux only works in “emulate” mode and is very slow. If that still doesn’t work, try VMWare Fusion, a personal edition is free.
VirtualBox Install Steps
-
Download and install VirtualBox
-
Download a Linux .iso file (see above)
-
Prepare VirtualBox
- For this first part, we will follow an existing guide. You can also simply read along the official Ubuntu VirtualBox install guide.
- Note that this is for an older version of Ubuntu, but everything is the same up until where you need to actually install Linux (the “Install Ubuntu” heading), which is where you go to step 4 below
- Follow the guide until the “Install Ubuntu” Heading, taking into account these changes/options:
- Memory size:
- Best to choose at least 2048MB of RAM for the Virtual machine
- Disk size:
- For Ubuntu: choose a disk size of at least 10GB
- For Bodhi: choose a disk size of at least 6GB
- For both: you may choose the “Dynamically allocated” disk for this course if you don’t have much disk space on your machine
-
Install Linux
- In theory, you can run Linux without installing it (the “Try Ubuntu” option or the default state that Bodhi starts in). However, you would loose all files every time you shutdown the Virtual machine, so we recommend installing it proper for the duration of this course
- For Ubuntu:
- Ubuntu starts into a selection screen where you can choose to either Try Ubuntu or install it. Choose install.
- Follow the default installation instructions in the wizard (similar to the guide we’ve been following)
- You can safely erase the disk: this only erases the virtual disk, not your real hard drive
- You do NOT need to choose additional encryption
- For Bodhi:
- Bodhi starts into a selection screen with several options. You need to be fast, because after a while it auto-selects the first option (= try without installing). Instead, use the arrow keys to choose “Install Bodhi”
- Follow the default install wizard, choosing the default options
- You do NOT need to choose additional encryption
- After installation, reboot and login with your created account
VirtualBox Install FAQ
- [WINDOWS] The screen looks very interlaced
- Settings > Display
- Graphics Controller VBoxVGA -> VMSVGA
- I want to change the keyboard layout!
- I want to be able to copy-and-paste text between my Host (my own computer) and the Guest (Linux ISO)!
- I want to install something else such as my own favorite editor!
- I want to change the resolution of the VirtualBox display
- This is sadly non-trivial with VirtualBox, where by default you can either choose the small/windowed view (default), or a fullscreen view from the menu.
- To choose a dynamic resolution, you need to install the “VirtualBox Guest Additions”
- Boot the Virtual Machine and login
- In the VirtualBox menu on top, choose “Mount Guest Additions CD Image” (bottom option)
- This should allow you to auto-install the necessary software. After this, reboot the VM and you should be able to choose new screen sizing options in the VirtualBox View menu
- Sometimes this step requires additional software to be installed first. This typically does the trick:
sudo apt install -y make perl. After this, reboot the VM and re-Mount the CD image.
If you encounter any other issues, Google is your friend. There’s a high chance others have encountered the same problem as you have, and have posted a solution.
Step B: Install compiler & files
Once you’re able to boot up Linux—either by using virtualization or by (dual) booting directly into it—you’ll need to make sure you’ve got the gcc compiler and course files at the ready.
Preparing gcc
- For many exercises in this course, we will use the “GNU Compiler Collection” (GCC) to run our C program code.
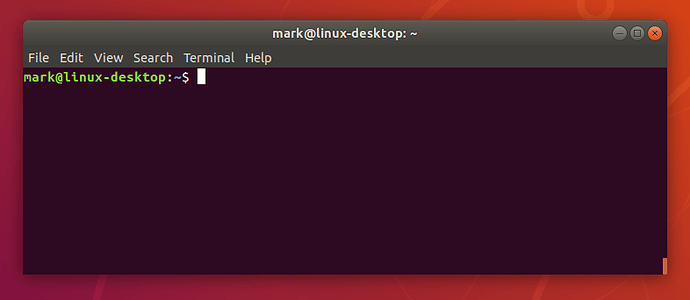
- We will do this from the “terminal” or “command line”, a textual interface. This comes pre-installed in Linux. Look for an icon like this one, which should open a screen that looks a bit like this one.
- To check if GCC is installed (it should be), type the following command in the terminal and hit enter:
gcc -v
- the output should be a list of details of the GCC program, and should end with a line starting with “gcc version”
- if this is not the case and you get an error message saying GCC is not installed, please execute the following command
sudo apt update && sudo apt install -y gcc (it will ask you for your password) and try again
Preparing the course files
- For some exercises, we provide some basic code to help you get started
- This code is hosted in a GitHub repository. If that sounds like Gobbledygook to you, no worries: the Software Engineering course will explain all about Git and version control soon
- For now, you just need to execute following commands in the terminal:
- Install git:
sudo apt update && sudo apt install -y git
- Go to your home directory:
cd ~/
- Download the course files:
git clone https://github.com/KULeuven-Diepenbeek/osc-exercises.git course-files. This will create a new directory named “course-files” containing the necessary items. You can verify this by typing ls -la
You should now be ready to follow along with the classes!