5. Demo Project
How Long To Beat
The demo project, residing in a separate Git repository at https://git.brainbaking.com/wgroeneveld/howlongtobeat-android under the MIT license, incorporates everything this course has to offer, to give you a taste of what is possible to create within a limited time frame using your newly acquired knowledge. It contains:
- One main activity,
MainActivity, controlling the navigation drawer - Many segments controlled by a navigation system, including two
RecyclerViewlists. - Permissions for internet and the camera, and an intent system to share information.
- Data storage through SQLite and Room, plus private file storage for images.
- Multiple HTTPS API calls to demonstrate the retrieval and processing of data.
What does it do?
A (moving) picture says more than a thousand words:
In case that still wasn’t clear, it:
- … recognizes Game Boy and Game Boy Color cartridges based on a snapshot you take from your retro games.
- … downloads art data and checks on howlongtobeat.com how long it takes for an average player to beat the game.
- … saves this information in your personal game database if selected.
- … shows some basic statistics on your game completion progress.
How does it work?
The cartridge recognition system (logic in GameFinder.kt) is programmed to adhere to the following logic flow:
First, the resized camera picture is uploaded to Google’s Vision API. You will need your own API key and put it in apikeys.properties, see the README.md file in the repository. Google offers a free trial to its Cloud system.
Next, the Vision API returns OCR-recognized text from the image. We’re interested in the so-called cartridge code on the left of the cart, which starts with DMG- (Dot Matrix Game) if it’s an old school Game Boy cart, or with CGB- (Color Game Boy) if it’s a Game Boy Color cart.
For example, the Wario Land: Super Mario Land 3 cartridge:
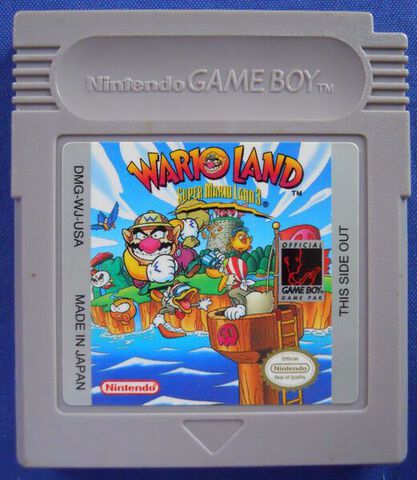
displays DMG-WJ-USA sideways. This code uniquely identifies the game. Google’s Vision API is not smart enough to detect the fancy lettering in the Wario Land logo, sadly.
Next, based on that code, the app searchers for the matching game title, either in a pre-defined repository (an embedded .csv file based on the database of gekkio.fi), or if it was not found, fires off a DuckDuckGo search to try and interpret its results as a game title. Note that there is no real DuckDuckGo API: the app employs HTML scraping.
Lastly, if a game title could be found, it is fed to howlongtobeat.com—also using (admittedly a bit advanced) HTML scraping—to finally return the results in a list for a RecyclerView to display to the user. If at any step something goes wrong, a correct error message is displayed, and the user can retry the whole process.
Selecting a result from the HLTB results list automatically adds that game to your local database. You can “finish” the game by checking a checkbox in the game detail screen, meaning it took you x hours to finish. The statistics dialog box shows how long you still have to play to finish your entire collection. Good luck have fun!
Inspecting the source code
What to look out for in the source code?
- Try to understand how the unit tests are written. Again, note the difference between Android-instrumented tests, which run more slowly, and genuine unit tests. The
mockkframework is used to mock out certain objects in certain tests (see test driven development). - Try to identify the information flow as described above. Can you follow its logic and see where one fragment switches to another one? Understanding the general flow of the program is very important!
- Note the use of interfaces. In case the Google Vision API does not suffice anymore, or the free trail threshold limit has been reached, it’s easy to remove it in favor for another OCR-based API, thanks to the
ImageRecognizerinterface. Furthermore, it simplifies unit testing and separates the view code from the API logic.
Some more advanced concepts of Kotlin/Android, such as suspend and coroutines, which are not part of this course, can be safely ignored. Just remember that when executing IO calls that take longer than a second, it should be done on a separate thread, otherwise the main thread—and thus, the UI—becomes blocked! Starting new threads can be done simply by using the Java-specific logic you have learned in the INF1 course. Otherwise, there’s always Stack Overflow to help out. Make sure you understand what you adapt into your own project!
In case the project fails to compile: did you forget to create a properties file with your API key in it? See the readme and above!
Dependencies used:
kotlinxserialization (transfer results between fragments)kotlinxcoroutines (async job processing)mockkinstead of Mockito (mocking in unit tests)androidx.navigation(navigation)androidx.room(DB persistence)android.volley(HTTP calls)google.api-client(Vision API, 3 dependencies)
Build features used:
- Android View binding
- Custom build config flags
kaptfor Room annotation processingserializationfor Kotlin-to-Java serialization